
The fan-melting 3D dashboard trap
If you spend any time browsing smart-home communities, you have seen the hyper-realistic 3D floor plans. Enterprising self-hosters spend weeks modeling their drywall, windows, and sofas in Sweet Home 3D or Blender, rendering multiple lighting angles, and mapping them to Home Assistant. They look incredible in a static showcase screenshot.
But actually running them is a different story. If you keep a Home Assistant tab pinned in your browser, those heavy 3D floor plans are a quick way to turn your laptop into a space heater. WebGL-heavy dashboards and massive, unoptimized render layers can turn a simple task like checking if you left the basement light on into a laggy, CPU-hogging chore.
Your browser is already running hot under a mountain of active tabs. The last thing it needs is a fully modeled 3D physics engine running in the background just to toggle a smart plug. We need a way to visualize our homes that is responsive, recognizable, and light enough to live in a browser tab without demanding its own dedicated GPU.
Enter the 16-bit RPG floor plan
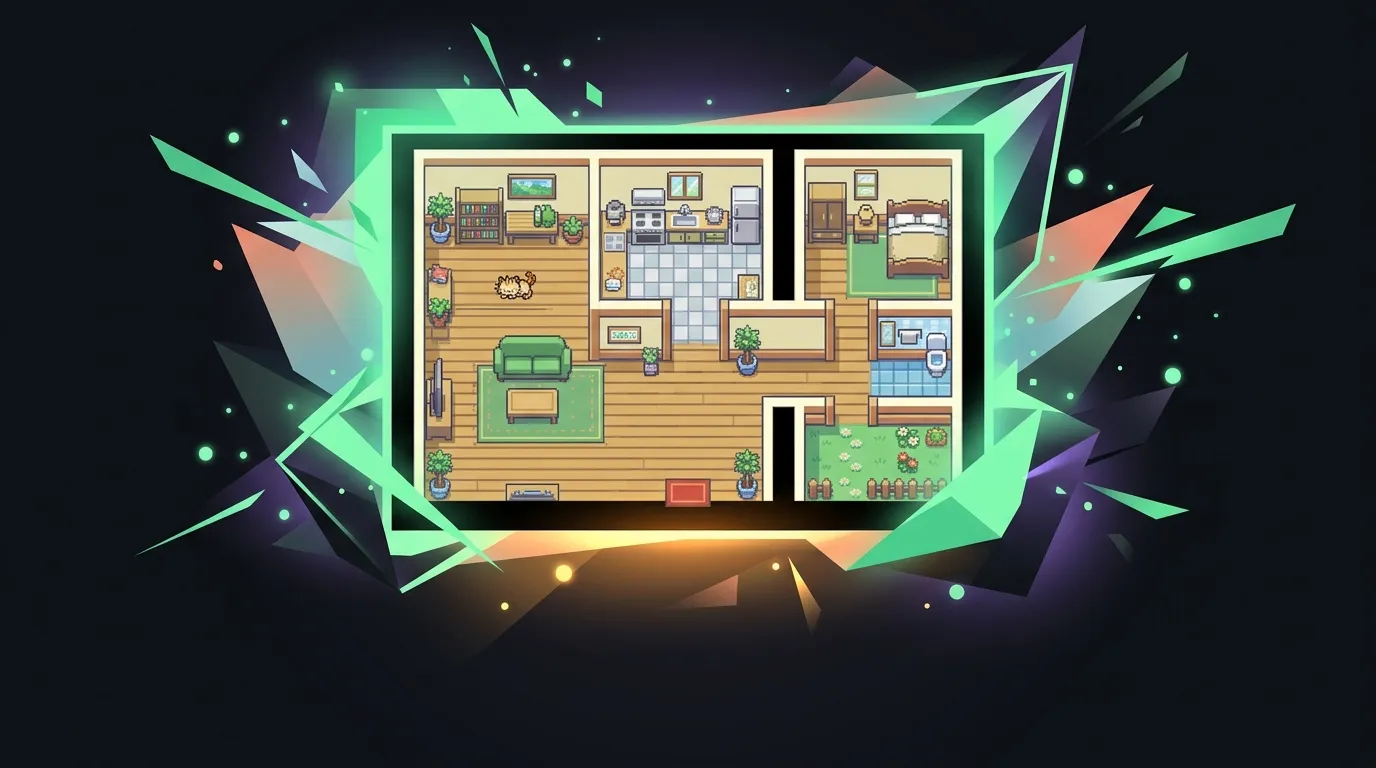
The solution to the heavy-dashboard problem is surprisingly retro. Rather than rendering thousands of polygons, smart home tinkerer u/katschung published a guide to creating a 2D top-down floor plan styled like a classic 16-bit Game Boy Pokémon game. A subsequent showcase by u/anonym9173 proved that this pixel-art approach is not just a gimmick; it is a highly responsive, real-time status monitor.
As you move through your real-world house, the retro map updates instantly. Motion sensors and presence detectors sync to the pixel-art rooms, making the digital map react as things happen:
- Real-time lighting: Walk into the hallway, and the pixelated hallway illuminates. Turn off a lamp, and the corresponding sprite goes dark.
- Smart appliance states: Turn on your physical television, and the black pixel-art screen pops to life with an animated display.
- Desk zone occupancy: If you have presence sensors mapping specific chairs, your workstation screens can light up individually only when you are sitting at them.
By utilizing flat, layered PNG images instead of interactive 3D canvases, the entire dashboard renders instantly in any browser. It gives you the same glanceable utility of a 3D floor plan, but with a memory footprint that actually respects your laptop’s resources.
How the pixel art gets built
Building a custom 2D pixel-art map sounds like a job for a professional designer, but the community setup relies on simple, accessible tools. You do not need to hand-draw every single chair and rug. Instead, you assemble them using pre-made RPG asset packs called tilesets.
The foundation starts with the Pokémon Essentials tileset, which contains the classic flooring, walls, and structures from the handheld games. For more modern indoor items, builders often supplement this with LimeZu’s popular Modern Interiors tileset, which provides ready-made sprites for modern kitchen counters, office desks, and electronics.
Rather than wrestling with complex design tools, the community recommended path is to use Sprite Fusion, a free, browser-based tileset map editor. You configure a 16x16 grid, import your downloaded tilesets, and paint your rooms layer by layer. The goal is to build a symbolic representation of your home. You do not need perfect architectural accuracy; you just need a cozy, recognizable layout that is easy to read on a small screen.
Once you export your base floor plan as a flat PNG, you create the lighting states in an image editor like GIMP:
- Set up the dark room: Create a black layer over your base map and add a white layer mask. Using GIMP’s bucket tool, paint the mask with a light grey color (like HTML code
#d9d9d9) so the entire house looks darkened but still visible. This becomes your base background image. - Paint the illumination: For each light, create a separate project file. Use a soft airbrush with a black brush color on the white mask over your light source to “paint” the glow.
- Cut and export: Merge the layers down, use GIMP’s Free Select lasso tool to trace the boundaries of the illuminated room along its walls, invert the selection, and delete the rest. This leaves you with a transparent PNG containing only the glowing room overlay. Repeat this for every light in your house.
Controlling your house in a browser tab
Once your transparent PNGs are exported, you upload them to your Home Assistant’s /config/www/ folder (accessed in your browser via the /local/ path). The magic under the hood is powered entirely by Home Assistant’s native picture-elements card, meaning you do not need to install fragile third-party dashboard rendering plugins.
The YAML structure utilizes a layered stacking system. The base background of the card is your pre-darkened “night” PNG. On top of that, you place your light overlays and control points using two distinct elements:
- The Image Layer: This points to your GIMP-painted transparent light glow. You map it to your physical light entity and use Home Assistant’s native
state_filterproperties. When the light is on, the filter is set toopacity(70%)(or higher); when the light is off, it is set toopacity(0%). The browser renders these transitions smoothly, dynamically lighting up the room with zero page lag. - The Invisible State Icon: To actually toggle the lights, you place a
state-iconelement directly over the corresponding room or lamp sprite using precise CSS percentage coordinates (likeleft: 72%andtop: 53%). By reducing the icon’s opacity to zero, you keep the retro pixel-art aesthetic pristine. Tapping the invisible area toggles the light; a long-press opens the standard Home Assistant entity card for brightness controls.
The daytime transition is handled cleanly by using Home Assistant’s sun entity (sun.sun) in combination with conditional cards. At sunrise, the dashboard swaps the base background image from the darkened night overlay to a bright, sunlit daytime PNG. When night falls, the dashboard transitions back, hiding unlit rooms in shadow while active rooms glow warmly.
For complex appliances like televisions, builders use the popular Browser Mod integration and the Universal Remote Card. Tapping the pixel-art TV bench on your map opens a pop-up virtual remote directly in your browser tab, turning your passive map into an interactive command center.
The pixelated trade-offs
While a 16-bit RPG map is undeniably cooler than a standard grid of toggle switches, it is not a perfect setup for every homelab. There are real maintenance trade-offs you have to accept before committing to the pixel-art path.
First, positioning icons is a massive exercise in trial and error. Because the native picture-elements card relies on percentage-based offsets to place tap zones, you will find yourself constantly tweaking YAML values (left: 54%, top: 61%), saving, and refreshing your browser tab to see if your invisible button actually aligns with your bedside lamp.
Second, your floor plan is static once exported. If you buy a new desk, move your sofa, or remodel your kitchen, you cannot just drag a 3D model to a new coordinate. You have to open Sprite Fusion, paint the adjustments, re-export the flat PNG, re-import it into GIMP, and rebuild your transparent lighting masks. It is a workflow that rewards a finished, settled home layout rather than a constantly shifting one.
However, the upside is unparalleled browser performance. Heavy WebGL dashboards can stutter on older laptops or mobile tablets wall-mounted around the house. A layered 2D PNG setup runs flawlessly on cheap, low-spec hardware. If you want to repurpose an old iPad or a cheap Kindle Fire as a kitchen smart-home controller, this 16-bit layout will render smoothly where a 3D model would crawl.
Ultimately, this is a weekend project for a very specific type of smart home builder. If you are tired of sterile, corporate dashboards, spending a Saturday afternoon painting GIMP masks is a satisfying way to turn your smart home into a game. But if you are constantly shifting your furniture or want a quick, plug-and-play setup, you’re probably better off sticking to standard toggles.
Sources
- How-To Geek: Pokémon-Style Home Assistant Dashboard
- King of Computer Media: 2D Pokémon-Style Dashboard Feature
- Reddit: How to Create a Floor-Plan, Pokémon Style (Tutorial by u/katschung)
- Reddit: Interactive Pokémon Floorplan Showcase (by u/anonym9173)
- StrawberrySec: Home Assistant Pixel Floorplan Guide